Basic Lighting
The two most basic lighting methods are the light and light_spot entities. These both create “static lighting” which is pre-calculated in the compiler and included in the map as a special texture file known as a lightmap.
The Light Entity
Light is a point source which shines in all directions. Create one now and take a look at the Object Properties for it. Before we go any further, here is a very important warning about lights. Do not give a light entity a Name unless you are planning to have it turn on and off. Naming each light gives it a separate lightmap file, which can drastically increase file sizes and performance costs.
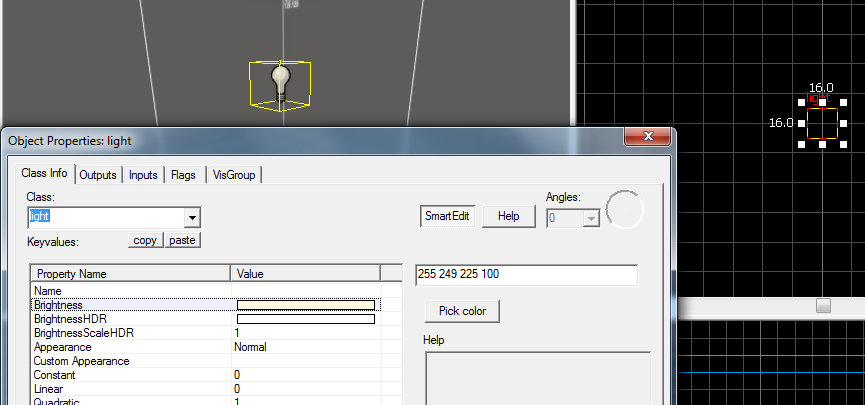
The light entity in the editor…
Select the Brightness field to see four numbers. The first three refer to a red-green-blue color and the fourth is the intensity of the light. The default value is 200, but I find that lower numbers are preferable to create more subtle ambient lighting. The next few options affect High Dynamic Range lighting (HDR).
See Also: Make Your Map Glow with Cubemaps and HDR
You can change the Appearance field to give the impression of a flickering bulb or a natural light source – just don’t overuse it! The rest of the settings affect the range over which the light casts. In my experience, the defaults are fine for this entity, but you could alter the 50 percent falloff distance if you want a light to cover a very large (or very small) distance.
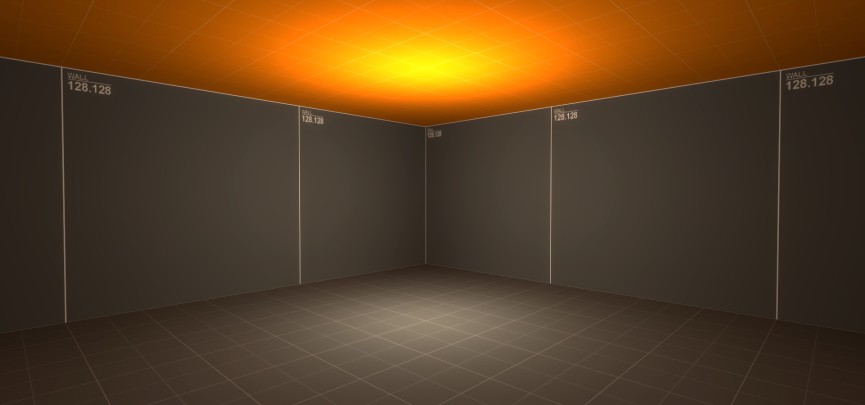
…and how it appears in-game.
The Light_Spot Entity
Predictably, light_spot simulates a spotlight. You can rotate it to point in any direction. Selecting a light_spot entity will show the cone in which its light casts in the 3D view.
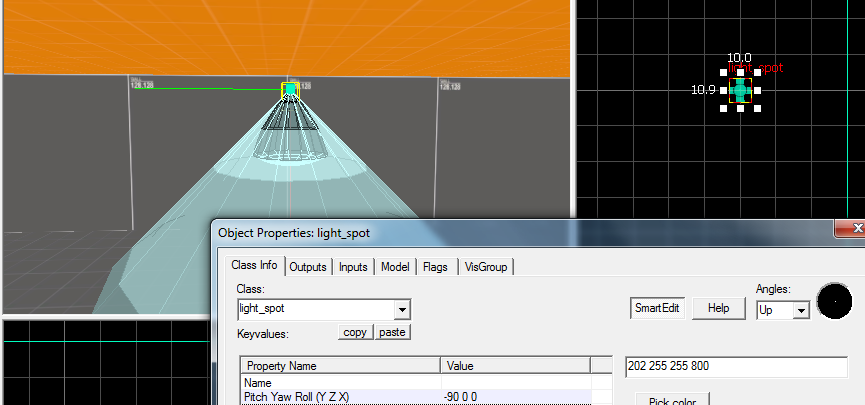
Light_spot is probably the most commonly used lighting entity.
The Properties for this entity are mostly the same. You should note that the Brightness values that you need for this entity tend to be a lot higher; I find 600-800 to be a good starting point for indoor spotlights. The angles for spotlights (the width of the beam) can also be altered. Use the 3D view to see the difference between the Inner and Outer angle. For spotlights pointing across large areas, it’s necessary to increase the falloff distances.
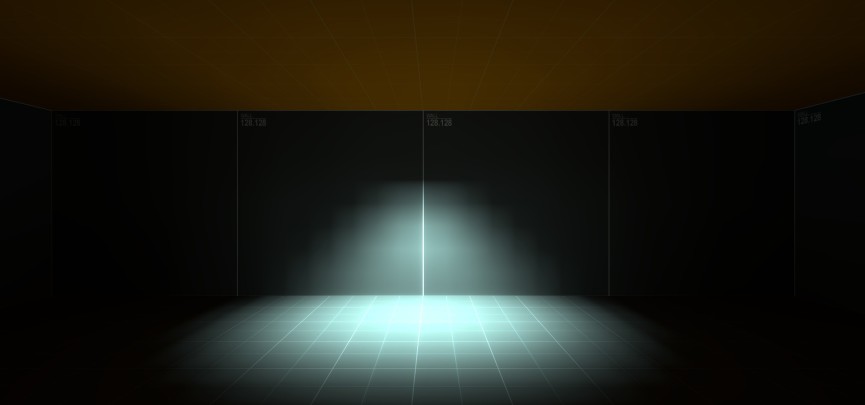
The “blocky” effect visible on wall can be minimized by decreasing the lightmap scale (see below).
Tips for Basic Lighting
- Avoid using very intense colors for lighting – unless you’re trying to make your map look like a rave.
- When using spotlights, it can help to combine them with a low-brightness light entity near the source of the spotlight. This can make the edges of the spotlight less “hard” and avoid the area behind it being too dark by giving an ambient light to the surrounding walls.
- Trial and error is often the best way to make lights look good. You can use the Cordon Tool to compile only the small part of your map which you are working on, making this process much faster.
- Inventive lighting can make an otherwise unassuming area look unique – try placing lights in a way that will cast interesting shadows.
- Lighting can be extremely important in showing the player important objects or guiding them in the right direction. This article provides a good example.
Exterior Lighting
Something we have yet to mention in these tutorials is how to make an “outdoor” environment. In Source, exterior areas are essentially just rooms with some of the faces replaced with skybox textures. Let’s create a fairly large area to test environment lighting in. Include some other objects so you can get an idea of how shadows are affected. From the texture browser, select tools/toolsskybox and apply it to the “ceiling”. In-game, this texture is replaced by the skybox.
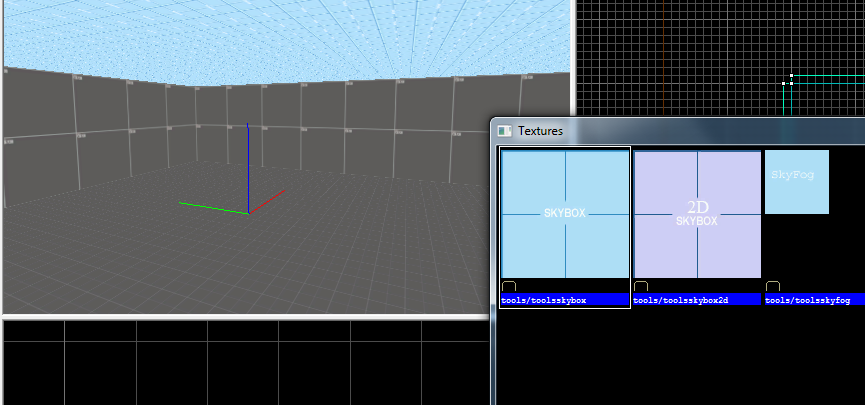
To change the appearance of the sky, go to Map>Map Properties and look for the SkyBox Texture Name field. For a list of available sky textures, check this page at the Valve Developer Wiki. Be sure to use the _hdr variant of the texture.
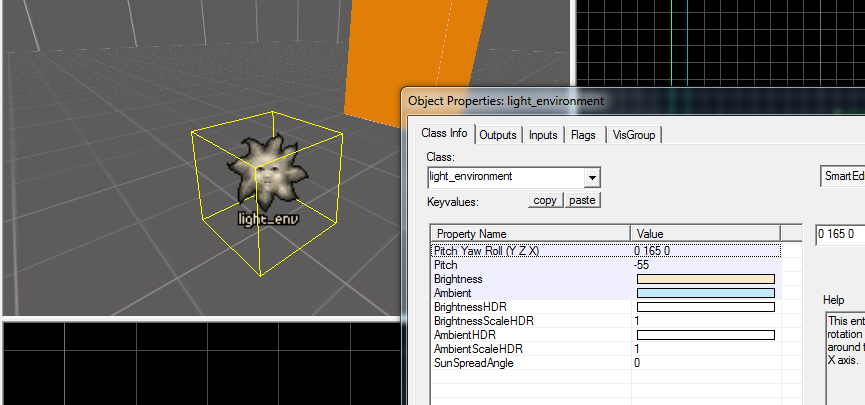
This entity creates light in all areas of the map with a line-of-sight to the sky.
To create the light which is emitted from the skybox, you need to create a light_environment entity. The position of the entity is not important. The object properties are again quite similar to other light entities. However there are two different brightness settings; Brightness refers to the direct lighting coming from the “sun” and Ambient refers to light that is in the “shade” (not in a direct line of sight of the sun angle). The Pitch Yaw Roll options for this entity are the direction that the light comes from in the sky. All these options can be difficult to get right, so the Developer Wiki page helpfully includes some example settings for each sky, which you can either use exactly or tweak to suit your needs.
Compiling With Lighting
By now, you should be comfortable with the basic compile options. In the Run Map window, select Expert… to get some more options for compiling with lighting. This view includes a number of premade Configurations for different compiles, balancing speed with appearance. The effect of the VIS options will be covered in a future tutorial on visibility.
For now, you only need to know that unchecking the VIS step will make the compile much faster, but will reduce the performance of your map (and cause problems with water). The HDR final compile gives the best lighting appearance but will take longer. In this view, the final $game checkbox determines whether the game will run after compiling.
As you may have noticed from the conspicuous “Part One” way up there in the title, we’ve not finished with lighting your levels just yet.
Read Part Two to learn about lightmap scales, dynamic shadows, projected textures and more exciting-sounding doodads!
More Source Mapping Tutorials
Hammer Tutorial: The Basics – By RedBadger
Absolute Beginners’ Guide to Source Mapping – By MisterAddy
Make Your Map Glow with Cubemaps and HDR – By Dooglz
Beginners’ Guide to Triggers, Inputs and Outputs in Source – By MisterAddy
A Guide to Lighting in Source (Part Two) – By MisterAddy

No Comments
No comments to display.