
This tutorial will show you how to create custom textures for use in creating maps for the Source engine. The process is also the same for creating textures for models, sprays, mods and essentially any image data within any Source game.
How to Create Custom Textures for the Source Engine
Modding & Development
Creating textures is not an intuitive process, but not an overly difficult task either. Unlike modern engines, there is no “drag and drop, and it just works” here, you must do most of the work yourself.
The Story of the VTF and the VMT
Textures are split into two files: the VTF (Valve Texture Format), a file containing the image data, the pixels of your texture, and the VMT (Valve Material Type), a file containing metadata and shader details about the texture. Both are used together when displaying a texture in the games.
The VTF
A VTF (.vtf) file contains all the pixel data, alpha maps and mipmaps that a texture can use.
They are created by converting an existing image file using a special program. The internal data is organised in a way which is most efficient for rendering, this is why normal .jpgs/.pngs can’t be used without conversion. The most important factor is that the dimensions of the image must be a power of 2, (i.e. 64×64, 128×128, 256×256, 1024×1024 and so on…)
A detailed technical analysis of the VTF implementation can be found on the Valve Developer Wiki.
The VMT
A VMT (.vmf) file is a plain text file which defines metadata about the texture.
It includes information such as:
- Is the texture translucent?
- Is it animated?
- Does it have normal/bump maps?
- What noise should it make when hit?
You can have more than one VMT file pointing to the same VTF image, but with different properties defined, which will make Hammer and the game treat the image as separate textures. Other advanced VMT features that make a texture more realistic will be covered in a future tutorial.
A more detailed technical analysis of the VMT implementation can be found on the Valve Developer Wiki.
Texture Creation
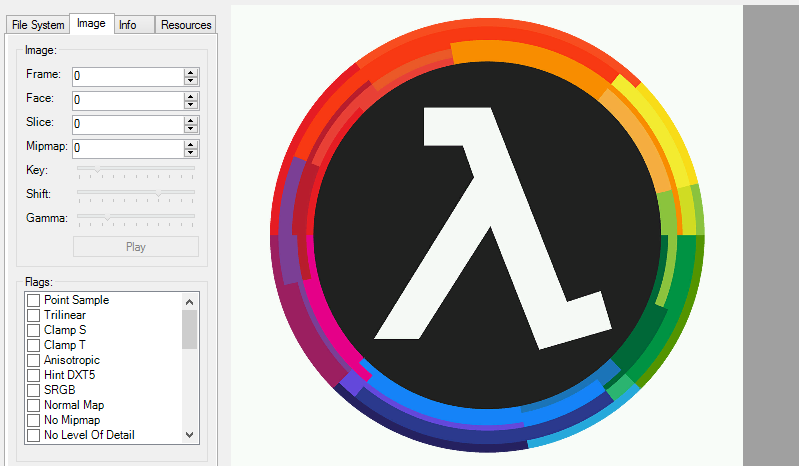
Let’s get down to it. I will be using the LambdaGeneration logo to make a texture from.
The circular logo is surrounded by transparency, but we will deal with that later. The image size is a whopping 1418×1418 pixels, which I resized to a power of 2 of 1024×1024. In reality you would want to use the smallest possible size, and only use textures this big for important stuff. Images of 512×512 pixels are a good basis for most textures.
To get our image from a normal format to a VTF, we need to use a program to convert it. Valve include one called VTEX with their games, it’s a basic command line tool that can only convert from TARGA (.tga) files. There is a much better alternative, VTFEdit which works with most image files and has many more features, including a straight forward user interface.
File Types
VTFEdit can open .bmp, .jpg, .gif, .png, .tga.
If you are unfamiliar with the types of image formats, all you really need to know is:
- PNG, GIF & TGA support transparency,
- GIF supports animation (but has to be split it into frames to import them)
- JPG is recommended for everything else
- Don’t touch BMP
PNG-8 vs PNG-24
24-bit PNG files support variable transparency, but don’t seem to import well into VTFEdit, so for variable transparency we must use TGA.
TARGA (.tga) Images
TARGA is an old weird image format, it has plenty of nice features, but has been mainly overtaken in most industries by PSD or PNG files. The primary issue that you will have with it is trying to find a program that can output/edit them. As you may have guessed, Photoshop is the weapon of choice for this. VTFEdit/VTEX love TARGAs, so if you are experiencing any import issues, converting to a TGA file might be your solution.
Importing into VTFEdit
At this point I assume you have your source image ready to roll. File>Import your image.
Firstly you will be greeted with this menu:

Vtf Import Options
That’s a lot of stuff, but I’ll break it down.
- Normal Format: What type of compression is used for standard (opaque) images, so if you have no transparency, this is the setting you are interested in
- Alpha Format: If your image has transparency, this is the compression that is used.
- Texture Type: This only applies if you imported more than one image, and it defines how it should be interpreted. Animated Texture is what you would want 99% of the time.
- Resize/Clamp: You can do some last minute resizing here, but it’s better to do it beforehand.
- Generate Mipmaps: Mipmaps are smaller versions of your texture that the game will use when you are further away from the texture, for efficiency. It’s best to leave this as default.
- Normal Map: Normal maps are an extra feature to fake depth on your texture. Again, it’s best to make one yourself, but you can use this feature to let VTFEdit try and auto-create one for you for testing.
A great guide on what compression to use is included on the Valve Developer Wiki. When in doubt, just use the defaults.
At the moment you don’t need to touch the Advanced tab (This is where the VTF version is set, leave it at 7.2 unless you know what you are doing)
Hit ok and you should see this:
At this point, unless you want to play about with any of the advanced tabs, you can File>Save and then you will have your VTF file.
Creating the VMT
We will be creating a bare-bones VMT file to go along with the VTF. Within the same folder where you saved the cooltexture.vtf create a new text file called cooltexture.vmt then open that with notepad or any text editor and insert:.
"LightmappedGeneric"
{
"$basetexture" "lambdagen/cooltexture"
"$surfaceprop" "MetalPanel"
"$surfaceprop2" "MetalPanel"
}
- LightmappedGeneric is the type of shader the texture will use, this is important when you want to do fancy effects or are creating a texture for a model file.
- Basetexture is the VMT file you created, notice how it doesn’t have a file extension, and that it is inside a lambdagen folder. We haven’t created this folder yet, but we will soon.
- Surfaceprop defines some of the physical properties of the texture.
There is a whole host of things you can put into a VMT file, there’s an extensive list of everything you can include on the Valve Developer Wiki.
Viewing and Using Your Textures
Now we have both a VMT and a VTF, let’s put it to use.
Firstly we must put them in the right folder, this depends on what game you are working for and how you have setup Hammer.
- Half-Life 2: Episode 2: Steam\steamapps\common\Half-Life 2\ep2\materials\
- Team Fortress 2: Steam\steamapps\common\common\Team Fortress 2\tf\materials
- CS:GO: Steam\steamapps\common\Counter-Strike Global Offensive\csgo\materials
The standard practise is to drop all your material files into a subfolder (such as \lambdagen), so the base directory doesn’t get full of possibly conflicting materials. Remember to also reference the name of your folder in the VMT file.
Assuming you are creating texture for mapping, load up Hammer, and do a search on the materials browser for your new texture. If all goes well, you should see it. If you don’t see anything, you have may not placed the files in the right place. If you see you texture but it’s blank/purple/just not right, then it may be an issue with the encoding of the texture, or your set-up of the VMT file.
Custom Textures in Hammer
Bing Bang boom, your new texture is in game.
Creating Textures with Transparency
- Make sure your source image has transparency/Alpha Channel (TGA works best here).
- Use a compression that supports Alpha (the default DXT5 is fine)
- Add this to your VMT: “$translucent 1“
- And that should be it.
Creating Animated Textures
Most of the work in creating animated textures is before the import process, as the frames of the animation needs to be in separate image files. This can be a pain, but Google is your friend.

Animated Lambda Generation Logo
Once you have your images, the file-names need to be numbered like so: imagename_0000.tga, imagename_0001.tga, imagename_0002.tga.
Select all the images at once on import, and VTFEdit does the rest.
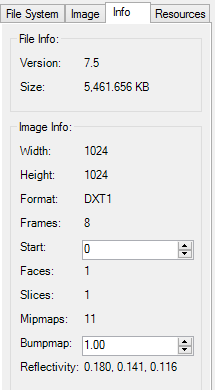
To check if this worked, look at the info panel, and you should see that there is more than one frame.
The VMT file for animated texture get’s a little more detailed:
"LightMappedGeneric"
{
  "$baseTexture" "lambdagen/lg-anim-1"
  "$surfaceprop" "MetalPanel"
  "$surfaceprop2" "MetalPanel"
  "$translucent" "1"
  "Proxies"
  {
    "AnimatedTexture"
    {
      "animatedTextureVar" "$basetexture"
      "animatedTextureFrameNumVar" "$frame"
      "animatedTextureFrameRate" "10"
    }
  }
}
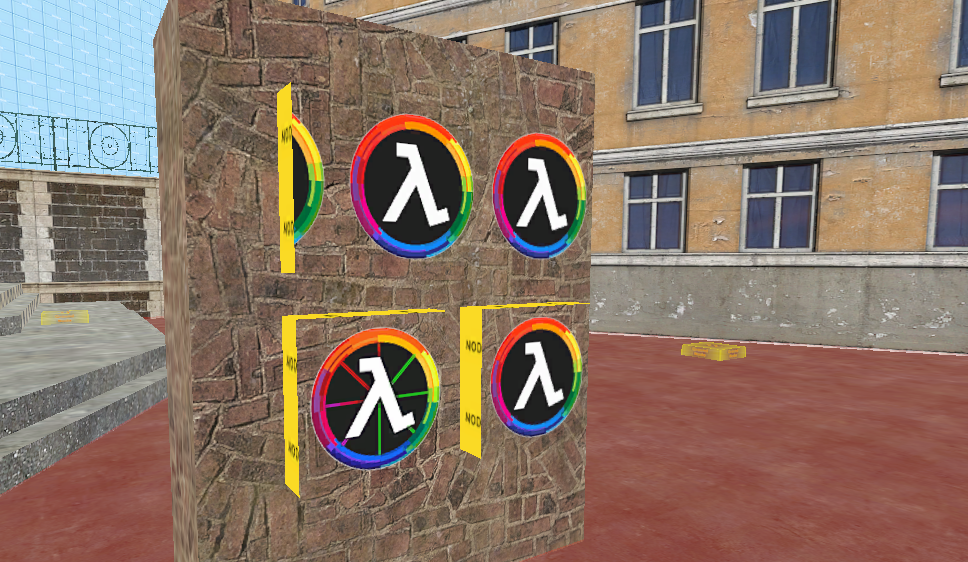
Result
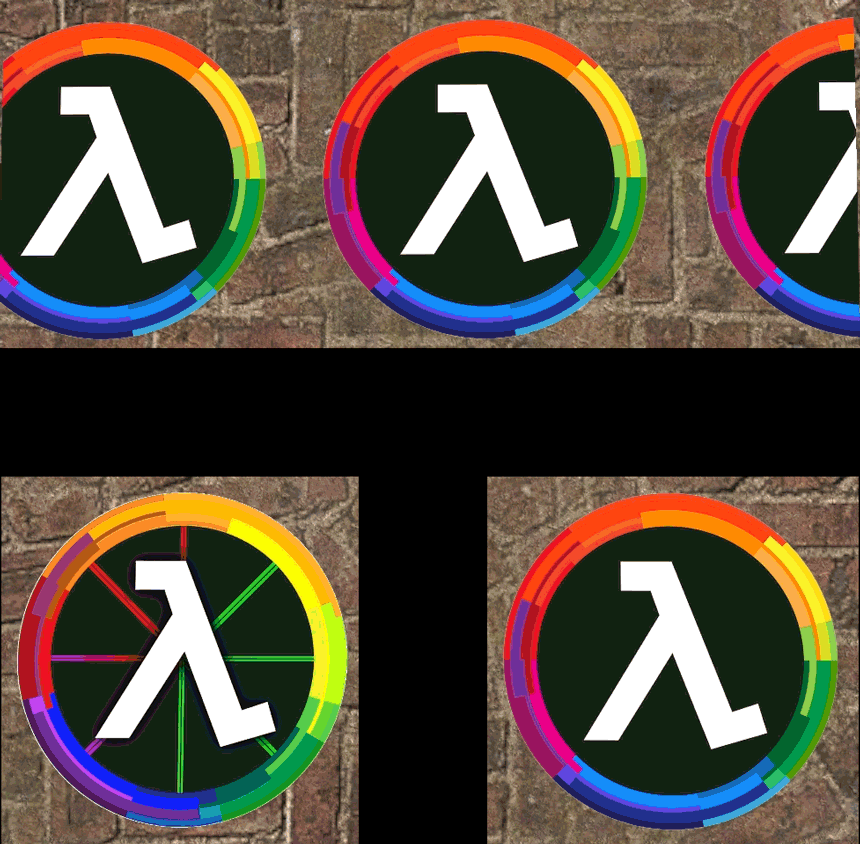
Custom Texture Result
The bottom left texture is an animated texture, the top texture is static, but is using some magic in the VMT file to achieve animation. This will be covered in a future tutorial, but have a look at the source in the included download at the bottom of the page.
Packing Textures into Your Map
Things get a little game specific here. If you are wanting to distribute your map with custom textures online, then the best way to do this is to pack the textures into the BSP file.
For Garry’s Mod addons, you don’t have to do this, as the GMA addon structure preserves file hierarchy. However, if you want people to host your map on their servers and you don’t want them to bug you with “your map sux it has missing textures” messages, then you better just pack your textures into the map file anyway. This happens as people will always decompile your GMA file, so they can use FastDL rather than workshop to host their server files.
So how do you pack files into a map? You use Pakrat.
Pakrat is a program that allows you to open up a BSP map file and modify the information stored inside. BSP files are containers (like .zip files), they can hold multiple files within themselves, usually the map data, light data, cubemap textures and any custom content you want to ship your map with.
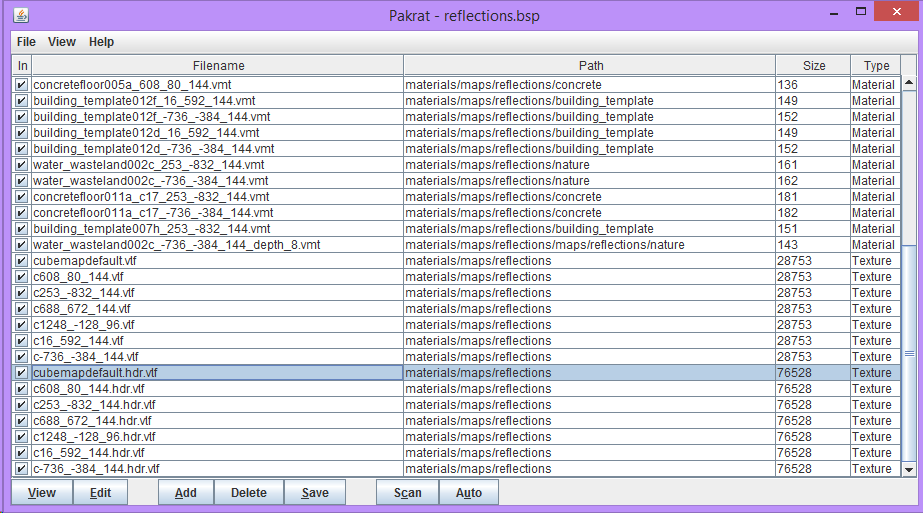
Pakrat
The next step is rather straightforward, open your compiled map, press “Add” and add your textures.
Pay attention to the Path column, it should be something like “materials/yoursubfolder/“.
Save the map, and you’re done. For testing rember to remove your textures from the games materials folder to see if the files included in the bsp actually work, or better yet, test it on another computer.
Useful Notes
- Check the console if you are having issues, it may give you some insight into why a texture isn’t working correctly.
- Source caches texture data, so a “reload” command won’t show any changes you have made, load another map and then load back, or restart the game to see any changes. This is also true for hammer, but only a restart can cause an update, thankfully hammer is fast to load.
- Check the VTF version when importing into VTFEdit, different games only support some versions, 7.2 is a well supported (but old) version.
Download Tutorial Files
You can download all the source images from this tutorial, and the output files to play about with here.
More Source Mapping Tutorials
Hammer Tutorial: The Basics – By RedBadger
Absolute Beginners’ Guide to Source Mapping – By MisterAddy
Make Your Map Glow with Cubemaps and HDR – By Dooglz
Beginners’ Guide to Triggers, Inputs and Outputs in Source – By MisterAddy
Hi, very good logo and i want to use it. I’m very new with this so can you please tell me how can i change or add different alphabet?