
If you followed Part One of this guide, you should have some idea about the Source engine’s basic lighting capabilities. Now let’s go a step further to look at the more advanced techniques that the engine has to offer, including the extra capabilities of Portal 2, CS:GO and Dota 2.
A Guide to Lighting in Source – Part Two
Modding & Development
Tonemap Control
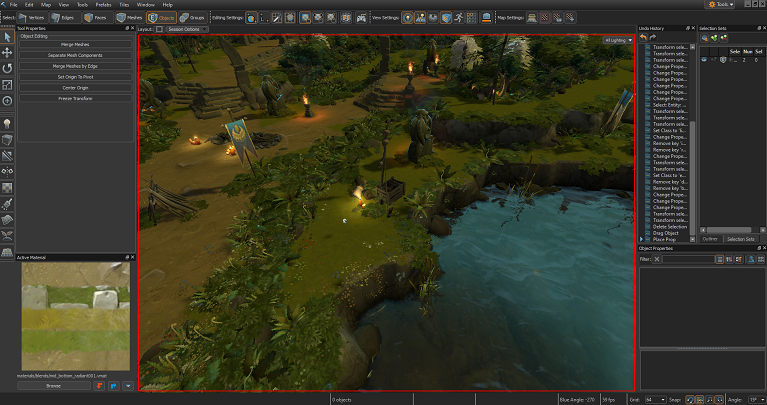
Taking a look at the exterior lighting that we created earlier, you may feel that the lighting is too “glowy” and intense. This is a trap which a lot of maps fall into, but fortunately there’s a solution through the use of an ingenious entity called an env_tonemap_controller.
Create one of these entities now. The tonemap controller is activated using inputs, so create a logic_auto to send outputs to the entity as soon as the map starts.
See Also: Beginners’ Guide to Triggers, Inputs and Outputs in Source
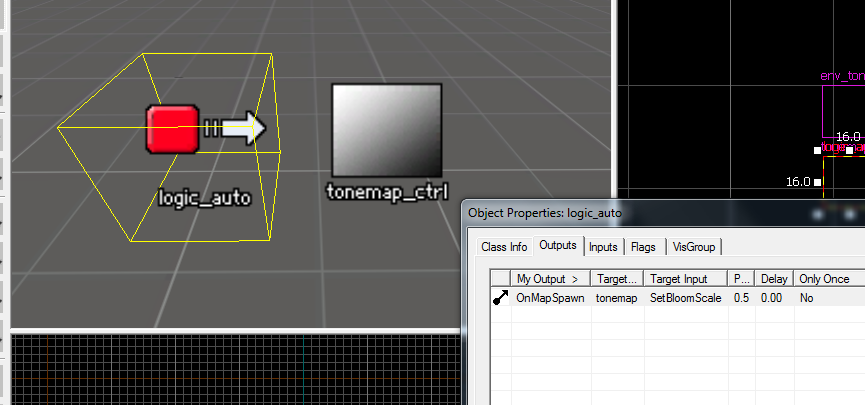
Essentially, this entity alters “the exposure of the player’s eyes”. There are a lot of different options here, but we’re just going to use the SetBloomScale input, which controls the HDR “bloom” effect. Take a look at this image to see the difference that different values cause.
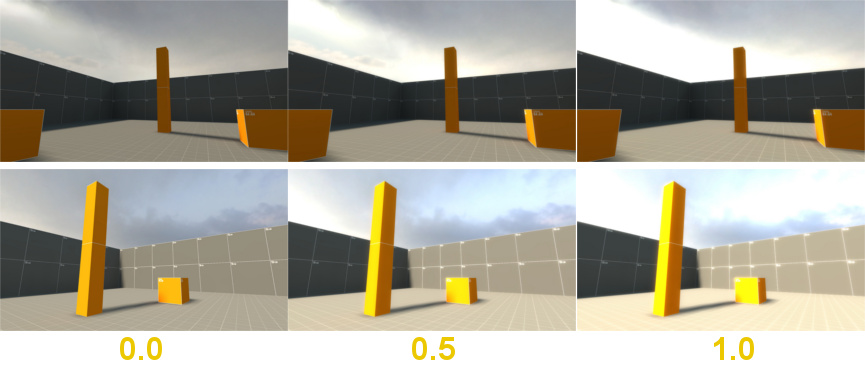
You can also test out these settings in-game with the mat_bloomscale command.
Lightmap Scale
A striking mix of light and shadow can improve any environment, but you might find your map let down by Source’s “blocky” looking static lighting. This appearance is caused by the low resolution of the lightmap, the texture onto which lighting is saved. Fortunately, it is possible to change the lightmap scale per brush face.
For this example, create a room with a light_spot and some brushes to cast shadows. Select Toggle texture application, and use the 3D view to highlight some of the surfaces surrounding your light source. You can now change the Lightmap Scale. Smaller values are equivalent to a higher resolution. To get a better idea of how the lightmap resolution is altered, change the camera on the 3D view to 3D Lightmap grid.

A compromise somewhere between these two lightmap scales would be more efficient.
Below is a comparison of the lighting in game, on the left a lightmap scale of 16 (the default), and on the right a scale of 2. The shadows in the right image are much sharper and more visible. Click the images to view full-size.

Be sure not to use this effect too regularly, as it will increase your map’s file-size and performance cost significantly.
Dynamic Lighting and Shadows
So far, we have only seen how to use static lighting in Source. The big limitation of this is that, since they are calculated in advance, the light and shadows do not react to the movement of objects or light sources in the game. Dynamic lighting and dynamic shadows are the opposite of this; they are calculated in real time during gameplay so can react to changes.
Due to the modular nature of Source, more recent games have seen big advancements in dynamic lighting giving you more mapping options.
Shadow_control for Prop Shadows
In Half-Life 2, CS:S, Portal 1 and Source Base mods, the way that NPCs and props cast shadows is through a basic render-to-texture method, seen below.
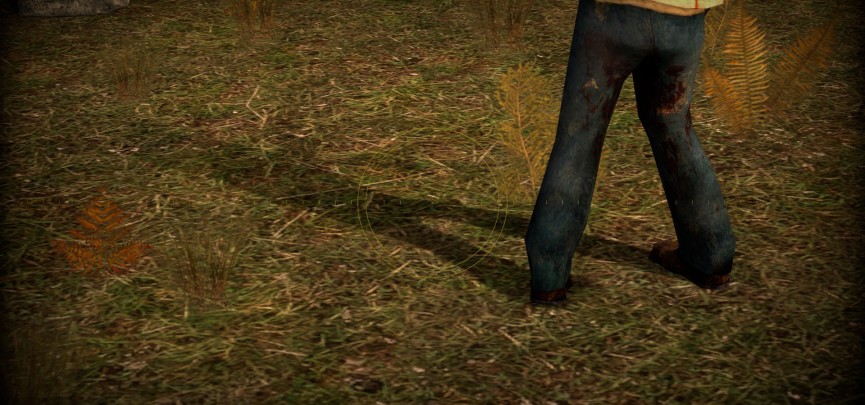
A dynamic shadow on an NPC in Episode Two.
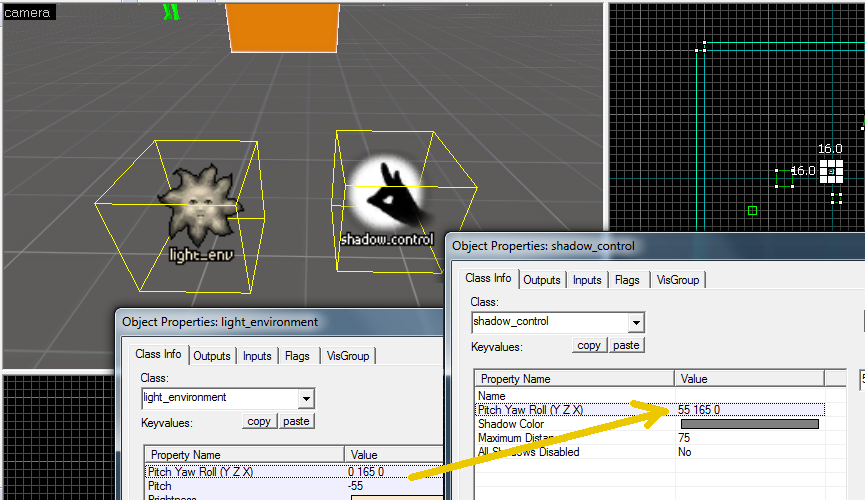
The restriction is that all the shadows are cast in the same direction, which can be defined by a shadow_control. The Pitch Yaw Roll for this entity should be the same as the angles in your light_environment in order to make the shadows consistent.
This causes problems in interior areas where these shadows look unnatural, so it can be best to use the Disable Shadows keyvalue in the properties of individual props.
In the Left 4 Dead games, Portal 2, and Alien Swarm, these shadows can be positioned based on the nearest light source, enabled via settings in the shadow_control entity and the respective light entities. It’s recommended to not have too many lights set to adjust the shadow angles in a given area, otherwise shadows will change sporadically as players and objects move around the room or won’t adjust their angles at all.
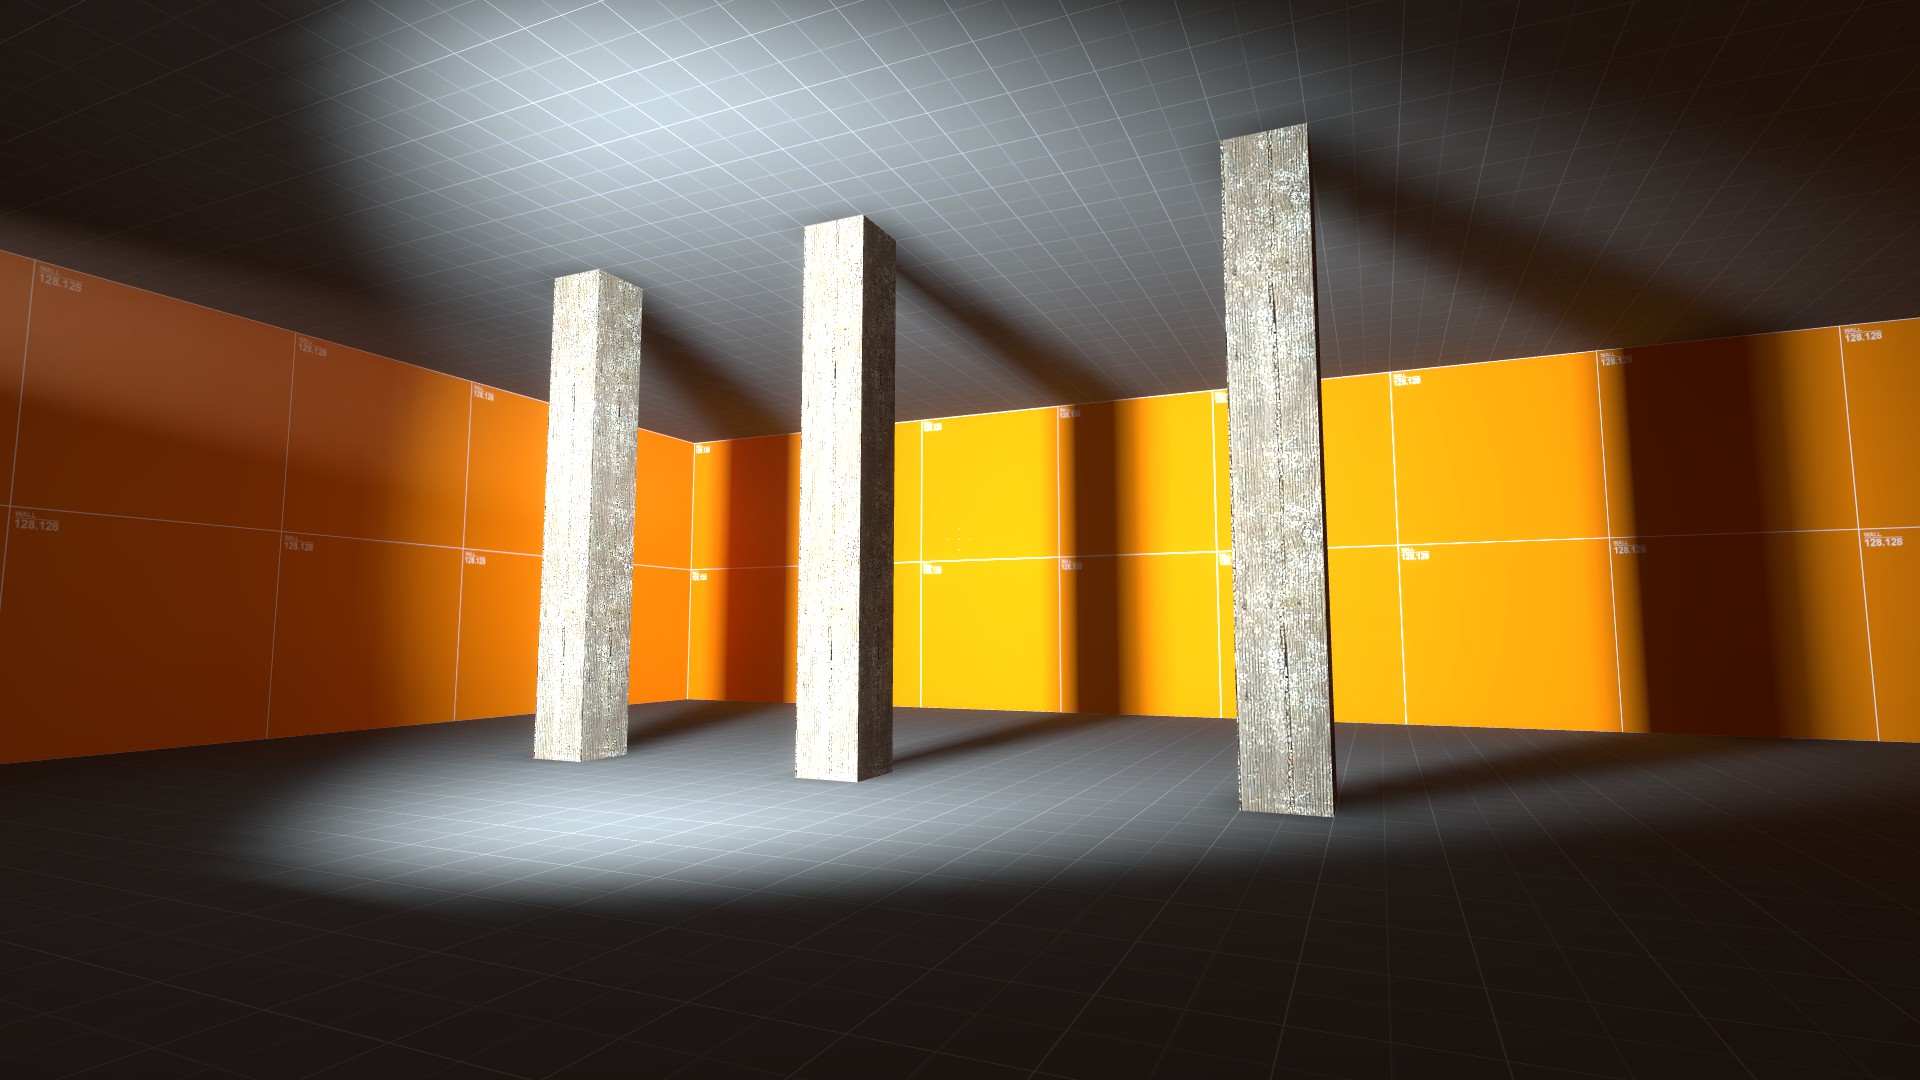
Projected Textures
Since Portal 2, Valve has made wide use of projected textures to create interesting scenes. As the name suggests, these light sources are simply images projected onto brushes and entities, causing light and shadow. There is a major restriction in using these entities in that Valve only allows one at a time to be turned on. (Modding can remove this limitation.)
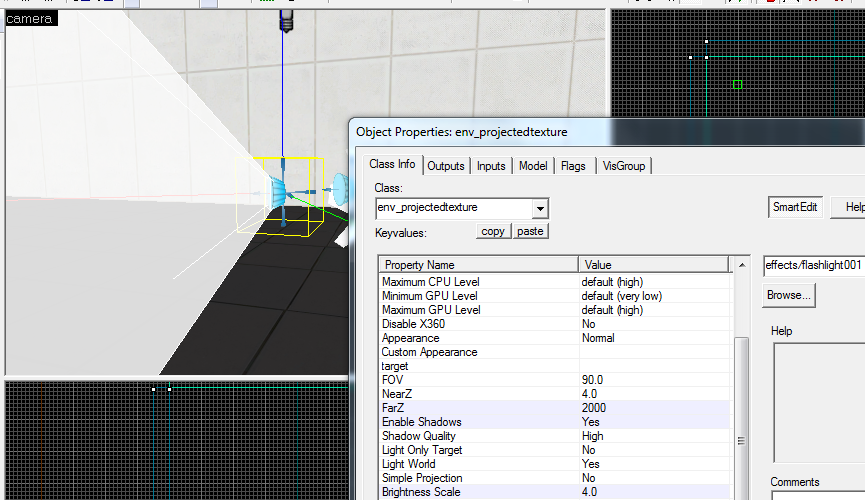
For the following example, I have used the Portal 2 Authoring tools. Create an env_projectedtexture entity; it can be rotated and positioned like any other light source. Looking at the Object Properties, there are a few more things to consider. Make sure Enable Shadows is set to Yes, and increase the FarZ to make the light cast over a longer distance. You can change the Texture name to alter the appearance of the light, but keep in mind that most other materials aren’t designed for this purpose! Add a normal light entity to the map as well.
Include some prop_weighted_cubes in the level, and when you run the map you should see that their shadows are cast dynamically as you move them around. You could even try using the Parent keyvalue to parent the projected texture to a physics prop so that you can carry it around. In my example I have also added a point_spotlight near the projected texture; this simulates the glow of a spotlight beam.
The scenes in Portal 2 involving Wheatley’s flashlight were made possible by projected textures.
The technology for projected textures does exist in earlier Source games including Half-Life 2, as it is used to create the player’s dynamic flashlight. However, using them is not recommended as there are even more limitations and they will interfere with the flashlight if both are enabled at once.
For more information about using env_projectedtexture in mods, see the Valve Developer Wiki page.
Global Dynamic Lighting
Dota 2 and CS:GO each have their own new entities which are used to create dynamic environment lighting.
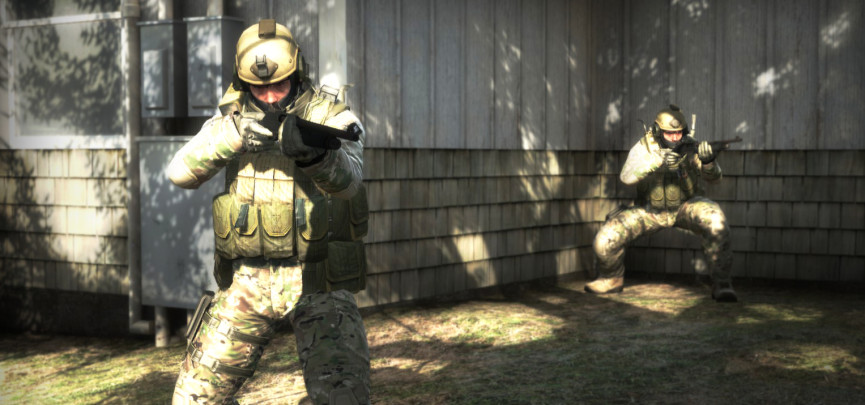
Global Offensive’s cascaded lighting appears on both brushes and models
In CS:GO, an env_cascade_lighting is used. This can simply be placed in the map, and then works in combination with an existing light_environment to cast dynamic light from the skybox. The entity uses a technique called a cascaded shadow map, to give a far more realistic and impressive appearance than is possible in earlier games.
Dota 2 uses a similar method, env_global_light. The entity is similar to a projected texture, and is positioned relative to Dota’s fixed camera to create environment shadows. In the new “Source 2” editor, you can preview this lighting in real-time.
Hopefully you’ve learned a bit about each of the lighting entities that Source has to offer. To find out more in-depth on each one, the Valve Developer Wiki is an excellent place to go for help. Also, looking at other mappers’ use of these tools can give you an idea of how to use them most effectively.
Please let us know your thoughts on these tutorials in the comments, where we’d also love to see any levels that you have created.
More Source Mapping Tutorials
Hammer Tutorial: The Basics – By RedBadger
Absolute Beginners’ Guide to Source Mapping – By MisterAddy
Make Your Map Glow with Cubemaps and HDR – By Dooglz
Beginners’ Guide to Triggers, Inputs and Outputs in Source – By MisterAddy
A Guide to Lighting in Source (Part One) – By MisterAddy
Article Sources
Thanks to hscsguy for help with this article!
No Comments
No comments to display.