So what are Cubemaps, and how are they related?
Cubemaps are the technology the Source engine uses for reflections, they are also an important part of integrating HDR into a map as cubemaps need to be generated for Low Dynamic Range(Non HDR) and High Dynamic range. We will come back to these after we have dealt with HDR.

Animated HDR demo – Watch as the exposures changes as your virtual eyes adjust to the outside light
HDR Setup
A technical analysis of the HDR implementation can be found on the Valve Developer Wiki.
Enabling HDR on your map is a very easy task as most of the work takes place during and after you render the map.
Lights
The first thing to check is your lights, each light entity has a “Brightness”, “Brightness HDR” and “BrightnessScale HDR” attribute.
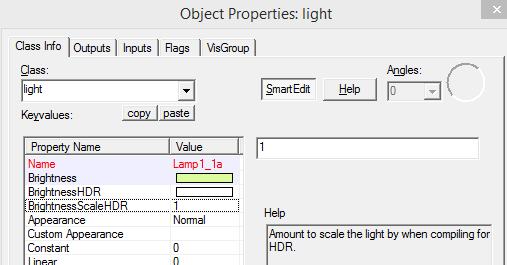
Hammer light properties
Brightness is essentially the color emitted by the light.
“BrightnessHDR” is a separate color to use if HDR is enabled, it is set to “-1 -1 -1 1” by default which means “Same as LDR”.
“BrightnessScale HDR” is a number to multiply the intensity of the light by if the HDR is enabled.
Normally you wouldn’t change the color for HDR, but you may find that you light is much brighter in HDR mode than LDR, so it’s quite common to lower the Brightness scale attribute to remedy this.
Skybox
This step is rather simple, make sure that the skybox texture you are using for your map supports HDR. Almost all the Valve skybox are either HDR ready or have a HDR version. Check the helpful Sky list on the wiki for info on available skyboxes and information to use for a nice looking env_sun.
More information about Skyboxes on the Valve Developer Wiki.
Compiling HDR
This is where your map becomes a HDR map, simply enable HDR when rendering the map. This is done by checking the HDR checkbox in the render settings, or choosing a HDR profile in the expert window.

Hammer Render Settings

Hammer Expert Render Settings
There is more to do after this, but first let’s talk about these shiny reflective balls….
Cubemaps
Computing reflections accurately can be a hard task, involving a large amount of ray-tracing, luckily there are ways to cheat for low-detail reflections, and it turns out low detail reflections are often perfectly adequate for video games. You won’t notice reflections most of the time, the human brain accepts things like shiny glass as the norm, but take these away and the absence will become noticeable.
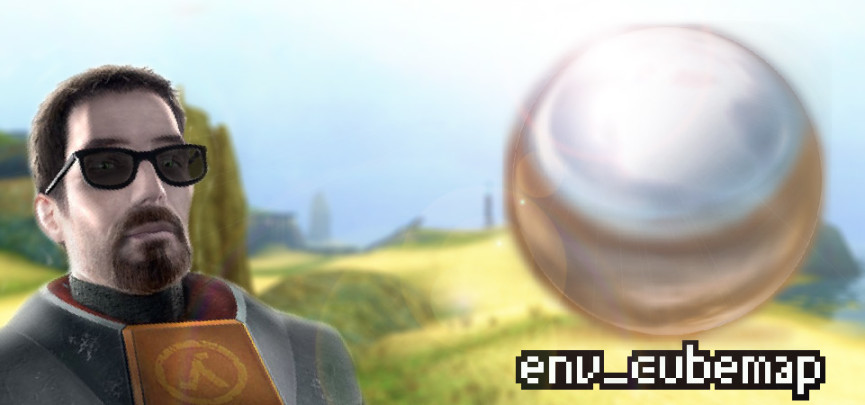
The source engine achieves decent looking “reflective/shiny/glossy” materials by using a set of images to base reflections from. These images are generated at the position of an env_cubemap entity in the world. This means that if you have one cubemap in one room, all the reflections in that room will be based from the same image. This would produce weird graphical artifacts, so the Cubemap takes 6 images, to form a complete panorama of the room (these 6 images form a cube, and are mapped onto shiny surfaces, cube… map).
With a panorama, objects can do some rotating of the Cubemap image and form a passible looking reflection. This means that you need to compute a cubemap for each distinct area or else you might have an interior room being reflected in your sniper scope when you are actually outside.
This is why, if you don’t use cubemaps, everything reflects the skybox, even inside buildings, as the skybox is used as the default cubemap (some games use the purple checkerbox pattern as the defualt)
A more technical analysis of the cubemap implementation can be found on the Valve Developer Wiki.
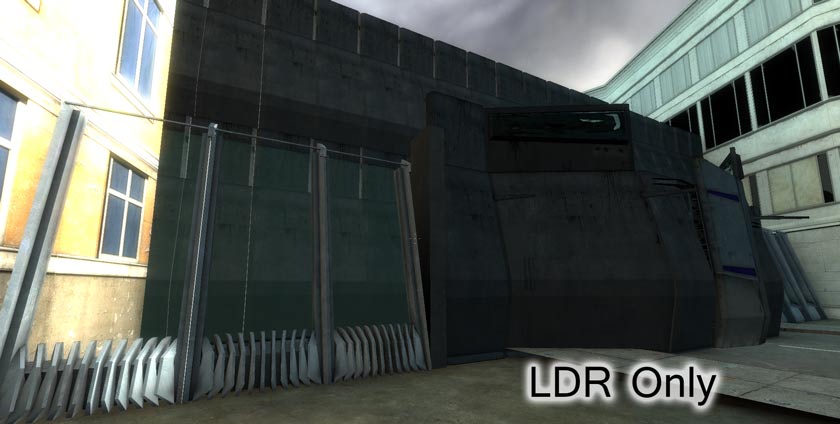
Comparison 2 (LDR) – Notice how flat the Combine structure looks, it almost looks like wood. Also note how the weak the glass panes look.
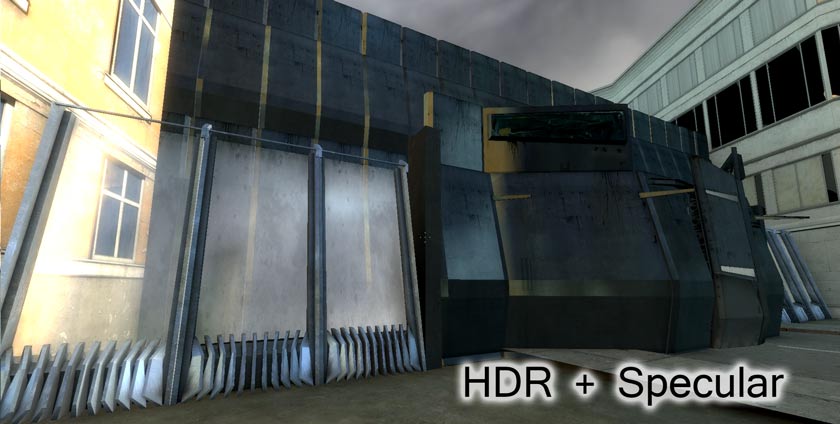
Comparison 2 (HDR) – This images shows the specular reflection on the combine metal, and the glass panes show their proper shade
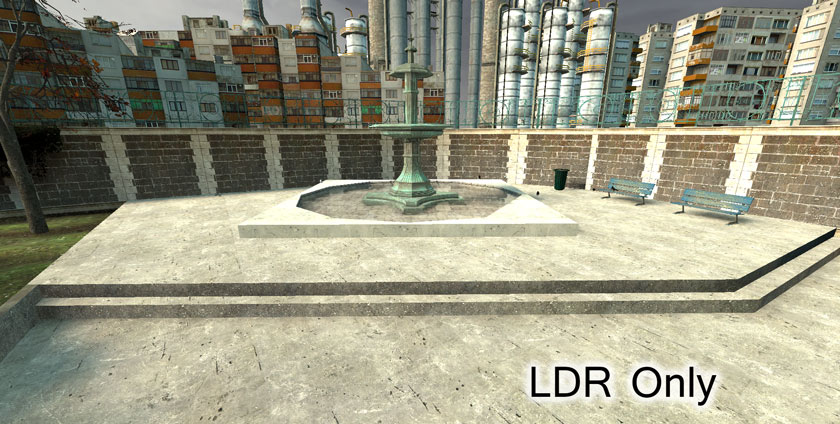
HDR Comparison (LDR) – Flat one-shade concrete maps, the quintessential look of the source engine.
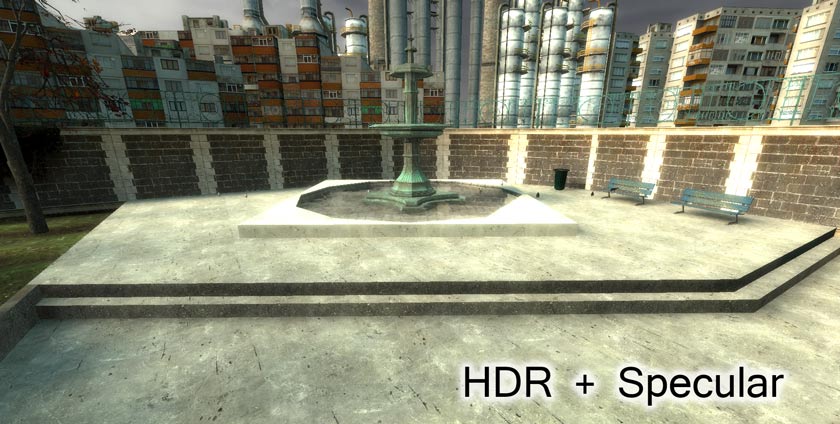
HDR Comparison (HDR) – Notice the extra contrast, darker shadows on the steps and in the pool, with bright highlights on the walls.
Cubemap Generation
Once you have you map ready to roll, with appropriate cubemaps placed, you need to compile the map and open it in your game of choice. The process of actually activating the cubemaps takes place in the game, after the render (an easy step to forget). The console command “buildcubemaps” starts the quick process of taking lots of screenshots from the point of view of all your placed cubemaps entities then saving these pictures into the map BSP file. After this process your map file may be substantially larger depending on your amount of Cubemaps.
This in theory is all there is to shipping your map with awesome textures and HDR, but in reality, it is more complicated. Hammer actually runs the cubemaps generation during the render process, however this seems to have completely stopped working in the latest builds of Hammer, and results in loads of useless blank textures being packed into your map file. Before we generate the correct HDR and LDR Cubemap textures in game, we must first delete the broken files with a program called Pakrat.
Pakrat is a program that allows you to open up a BSP map file and modify the information stored inside. BSP files are containers (like .zip files), they can hold multiple files within themselves, usually the map data, light data, cubemap textures and any custom content you want to ship your map with.
Download Pakrat
With Pakrat downloaded, open your map file and find the Cubemap textures, they are named along the lines of: c123_123_123.vtf and c123_123_123.hdr.vtf. Delete them and save the map file. Now we can generate fresh cubemaps by loading the map in the game.
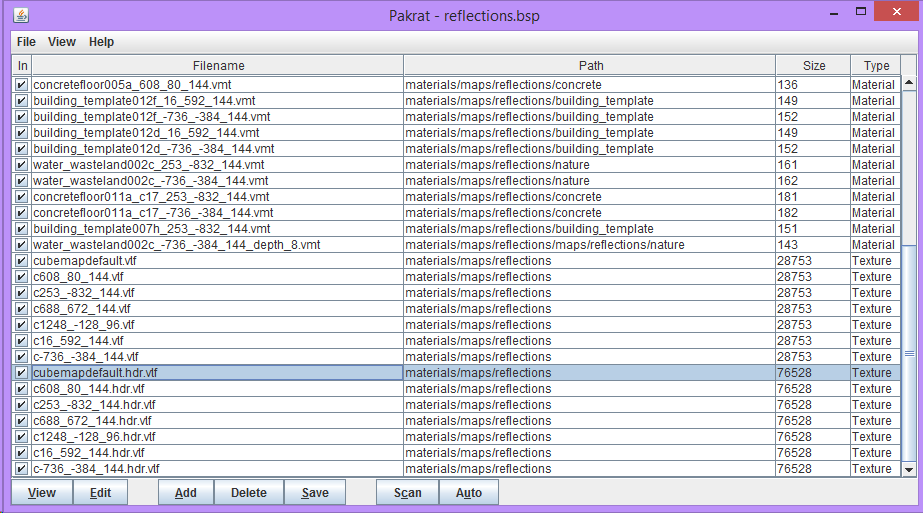
Pakrat
HDR+LDR Cubemap Commands
The full steps for removing old Cubemaps and properly compiling for LDR and HDR are listed here:
- Open your BSP file with Pakrat
- Delete the broken Cubemaps images. They’re of the type: “Texture” NOT “Material”
- Open the game
- Run: “mat_hdr_level 2” and “mat_specular 0”
- Load your map: “map yourmapname.bsp”
- Run: “buildcubemaps”
- Load another map to clear caches (Run: “Maps *” to see a list of maps)
- Run: “mat_hdr_level 0“
- Load your map again: “map yourmapname.bsp”
- Run: “buildcubemaps”
Your map is fully ready at this point, if you want to see the results:
Run: “mat_specular 1” : “mat_hdr_level 2”
Load another map to clear cache, then load your map again to see the results.
You can use the command “impulse 81” to test your Cubemaps if it is not obvious to see.
Some of these steps could become redundant if the bugs in VRAD are fixed, but I think it would be useful to know the whole process anyway.
BuildCubemaps Tips
- Don’t rename your map file after you have generated the maps, the files stored inside the .bsp can reference the file name. Sometime this causes a problem, sometimes it doesn’t, just be aware of this.
- Use pakrat to check what’s being stored inside you map file, to observe if the cubemaps are being stored successfully and to catch large sneaky files.
- Pakrat can display cubemap files as an image, if the files are black, something went wrong.
- Sometime the game instance started by hammer doesn’t generate cubemaps correctly, try launching the full release mode game from steam and use that for the generation.
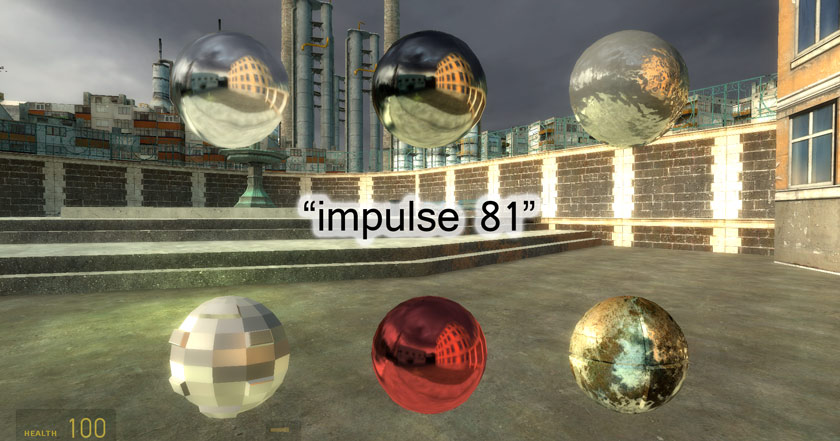
The result of the “impulse81” command – a great tool for checking cubemaps
Conclusion
Most of the time, HDR is an afterthought, something to be left until you have finished the map and are in the “final touches” stage. While this is mostly true, HDR can dramatically change the lighting scheme of your map, so be prepared to iterate a few times when you start your lighting pass. The Source Engine has aged really well considering its age, but nowadays it can really start to look flat and old in certain areas. Adding the extra bloom of HDR can squeeze just that little bit extra out of the game to make players feel like they aren’t playing a game from 2006.
More Source Mapping Tutorials
Hammer Tutorial: The Basics – By RedBadger
Absolute Beginners’ Guide to Source Mapping – By MisterAddy

Someone can help me with this issue ?
http://forums.steampowered.com/forums/showthread.php?t=3261929
I’m glad I keep reading up on this stuff.
There is so much you have to remember when making a professional looking map that it’s great to have amazing resources like this staying up-to-date, without having to resort to watching 20 minute YouTube clips.
Thanks for this guide, I have recently been trying to use cube maps and hdr but couldn’t find much about it outside of the wiki.
I think people underestimate how much difference proper cubemaps can make to the look of a map. If only they weren’t such a pain to implement now.